
The Ultimate Guide to Storing Fly Fishing Gear in Your Garage

Fly fishing gear has a sneaky way of multiplying. One season it’s a rod and a reel—next season, you’re knee-deep in fly boxes, backup waders, leader spools, floatant, and a pile of gear you swear you never bought. If you’re like most anglers, your garage becomes a catch-all for your collection. But without a system, it quickly turns into a tangled mess of line, hooks, and regret.
Whether you’re a weekend warrior or a year-round fly fishing fanatic, organizing your fly fishing gear in your garage doesn’t have to be a headache. With the right strategy, your garage can become a clean, efficient, and dare we say, enjoyable space to store and access your gear.
Here’s how to do it—step by step.
Step 1: Take Inventory Before You Touch a Storage Bin
Before you start buying pegboards or hanging rod racks, take stock of what you actually own. Lay everything out—rods, reels, boots, packs, tying tools, fly boxes, nets, and so on. Then divide it into categories:
Essential gear (used every trip)
Seasonal gear (like cold-weather waders or summer dry fly kits)
Backup or spare gear
Fly tying materials
Maintenance tools and accessories
Getting a visual overview of your gear helps you assess how much storage space you need and how best to use it.

Step 2: Prioritize Accessibility
Not all gear needs to be equally accessible. Think like a minimalist, even if you’re not one. Items you use frequently—like your go-to rod and pack—should be stored at eye level or within easy reach. Less-used items—extra reels, fly tying materials, off-season boots—can be stored higher or deeper.
Use the “grab-and-go” principle for gear you use most often. Imagine being able to walk into your garage and in 60 seconds grab everything you need for a trip. That’s the goal.
Step 3: Use Vertical Space Like a Pro
Your garage walls are your best friend. Here’s how to make them work for you:
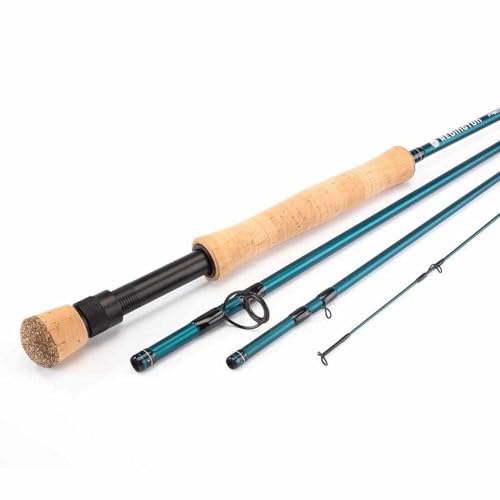
Rod Storage
Invest in a vertical or horizontal rod rack mounted on the wall. Horizontal racks save ceiling height, while vertical ones work well in tall garages. Avoid leaning rods in a corner or stacking them on a shelf—they’ll warp, tangle, or break.
You can also DIY with PVC pipe or wooden dowels to create custom holders that cradle the rod handle and tip.
Pegboards
Pegboards are the unsung heroes of organized storage. Install one above your workbench or a free wall and hang:
Forceps, nippers, scissors
Line spools and tippet
Fly boxes (especially if you add labeled baskets or shelves)
Nets
Floatant and dry shake
Label everything. You’ll save time and avoid buying duplicates.
Step 4: Smart Shelving for Larger Gear
Install a heavy-duty shelving unit to store bigger items like:
Waders and boots (use plastic bins with ventilation)
Backpacks or sling packs
Spare reels and rod tubes
Fly tying kits
Use clear plastic bins with lids and label each one. Stack bins vertically to maximize floor space and group similar items together—e.g., cold-weather gear in one, backup flies in another.
Bonus tip: Put a few silica packets in each bin to prevent moisture buildup.
Step 5: Create a Dedicated Fly Tying Zone (If You Tie)
If you're into tying your own flies, set up a fly tying workstation with a bench or table in the garage. Keep your materials organized in drawer organizers or clear tackle boxes sorted by material type: hackle, dubbing, hooks, thread, etc.
A small toolbox with multiple drawers can be a perfect solution for compact storage, and a task light with magnification is a worthy upgrade.
Make sure this space stays clean—stray feathers and hooks have a way of finding the worst places to land.
Step 6: Install Overhead Storage (Especially for Seasonal Gear)
If your garage has ceiling space, don’t waste it. Use overhead storage racks to keep off-season or infrequently used gear out of the way. Store items like:
Winter waders and heavy jackets
Spare rod tubes
Camping gear used on multi-day fishing trips
Just be sure to use sturdy containers and label everything clearly. You don’t want to be climbing a ladder and opening boxes blindly when spring runoff hits.
Step 7: Boot and Wader Drying Station
One of the biggest challenges is drying out waders and boots. Wet gear stashed in a corner will mildew fast—and stink up your garage.
Create a simple drying rack using:
A wooden frame or metal bar to hang waders
A tray or boot rack underneath to hold dripping water
A small fan or dehumidifier to improve airflow
Hang your waders upside down using hangers with clips, and always dry them fully before storing them in a bin or on a shelf.
Step 8: Build a Maintenance Station
Your fly reels, rods, and line all need periodic TLC. Set aside a small bench area for:
Reel cleaning
Line dressing
Knot testing and practice
Minor rod repairs
Keep essential tools and materials in a drawer or small caddy, and you’ll always have a place to do off-water maintenance without cluttering your house.
Step 9: Use Labels and a Gear Checklist
Once your gear is sorted and stored, label everything. Even if you know your gear inside and out, labels help maintain the system—and they’re a lifesaver if someone else needs to find your backup tippet or net while you’re out.
Consider printing a gear checklist for quick packing before a trip. Laminate it and hang it near your storage area. It’ll help you pack faster and avoid leaving key gear behind.
Step 10: Perform a Seasonal Gear Audit
Every season, take 30 minutes to go through your garage setup. Ask:
What didn’t I use this season?
What’s broken, worn out, or missing?
What can I donate, sell, or retire?
Regular audits help keep your gear collection lean and functional. You'll also avoid unnecessary purchases and ensure your system stays manageable.
Fly Fishing Garage Storage Checklist
Here’s a quick recap of key items and tips to keep your garage dialed in:
Storage Essentials:
Rod racks (wall-mounted or ceiling-mounted)
Pegboard with hooks
Clear plastic bins with lids
Heavy-duty shelving unit
Drawer organizers or tackle boxes
Overhead storage rack
Optional Upgrades:
Boot drying rack with tray
Fly tying desk or station
Dehumidifier or garage fan
Magnetic tool strip for small metal tools
Bench vise for rod and reel maintenance
Labeling Tips:
Use waterproof labels
Label by category (e.g., "Dry Flies," "Cold Weather Gear," "Reels")
Create a color-coded system if desired
Final Thoughts
A garage doesn’t have to be a chaotic mess of fly lines and soggy waders. With a little planning and the right setup, it can become a well-organized hub for all your fly fishing adventures. Not only will your gear last longer and stay in better condition, but you’ll also spend less time searching for your stuff—and more time on the water.
So go ahead, reclaim your garage. Your fly fishing gear deserves a home that’s as dialed as your double haul.
FAQs
What's the best way to store fly rods in the garage?
Wall-mounted rod racks or ceiling-mounted storage systems are best. Avoid leaning rods in corners to prevent warping.
How do I keep my waders and boots from smelling in storage?
Hang them to dry completely after each use, preferably with airflow from a fan. Store them in ventilated bins once dry.
Can I store fly reels in plastic bins?
Yes, but make sure they are clean and dry first. Use soft pouches or dividers to prevent damage.
What's the safest way to store fly tying materials in the garage?
Use drawer organizers or tackle boxes with tight lids to keep out dust and moisture. Store in a cool, dry spot.
How do I prevent rust on my fly gear in a humid garage?
Use silica packets in storage bins and consider a small dehumidifier. Always dry gear thoroughly before storing.
How often should I reorganize or audit my gear?
At least once per season. Check for worn items, missing pieces, and anything you no longer use.
// Related Posts About Fly Fishing


